Spring
Spring5 轻量级的开源的 JavaEE 框架
进度【55,Webflux】
源码解析笔记加入 进度【】
实际应用
如何注入相同类型中指定的 Bean ?
综合问题
[IOC?DI?AOP?](#IOC【Inversion of Control】)
BeanFactory 和 ApplicationContext分别是什么,有什么区别?
什么是bean?作用域?生命周期?是否线程安全?
SprintBoot(Sprint)中Controller、Service、DAO线程安全问题_zzhongcy的博客-CSDN博客_service线程安全问题
注解速查

常用注解,以 spring 分块:
AOP
Aspects
Core Container
Beans
Core
Context
Expression
Test
Web
WebMVC
Web
Data
JDBC
Transations
Spring5框架概述
1、Spring 是轻量级的开源的 JavaEE 框架
2、Spring 可以解决企业应用开发的复杂性
3、Spring 有两个核心部分:IOC 和AOP
(1) IOC【Inversion of Control】:控制反转,把创建对象过程交给 Spring 进行管理
(2) Aop【Aspect Oriented Programming】:面向切面,不修改源代码进行功能增强
4、Spring 特点
(1) 方便解耦,简化开发
(2) Aop 编程支持
(3) 方便程序测试
(4) 方便和其他框架进行整合
(5) 方便进行事务操作
(6) 降低 API 开发难度
相关资源
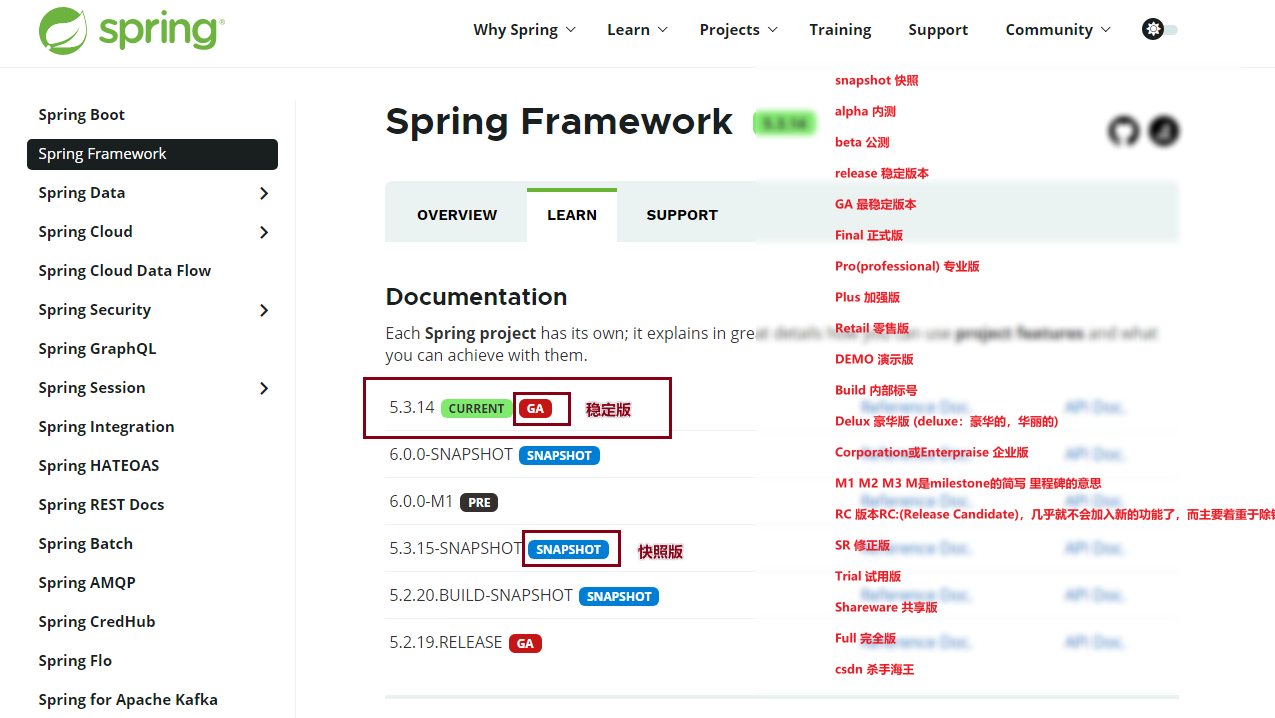
版本说明:
snapshot 快照
alpha 内测
beta 公测
release 稳定版本
GA 最稳定版本
Final 正式版
Pro(professional) 专业版
Plus 加强版
Retail 零售版
DEMO 演示版
Build 内部标号
Delux 豪华版 (deluxe:豪华的,华丽的)
Corporation或Enterpraise 企业版
M1 M2 M3 M是milestone的简写 里程碑的意思
RC 版本RC:(Release Candidate),几乎就不会加入新的功能了,而主要着重于除错
SR 修正版
Trial 试用版
Shareware 共享版
Full 完全版
下载:
https://repo.spring.io/ui/native/release
https://repo.spring.io/ui/native/release/org/springframework/spring
注:本文档使用5.2.6
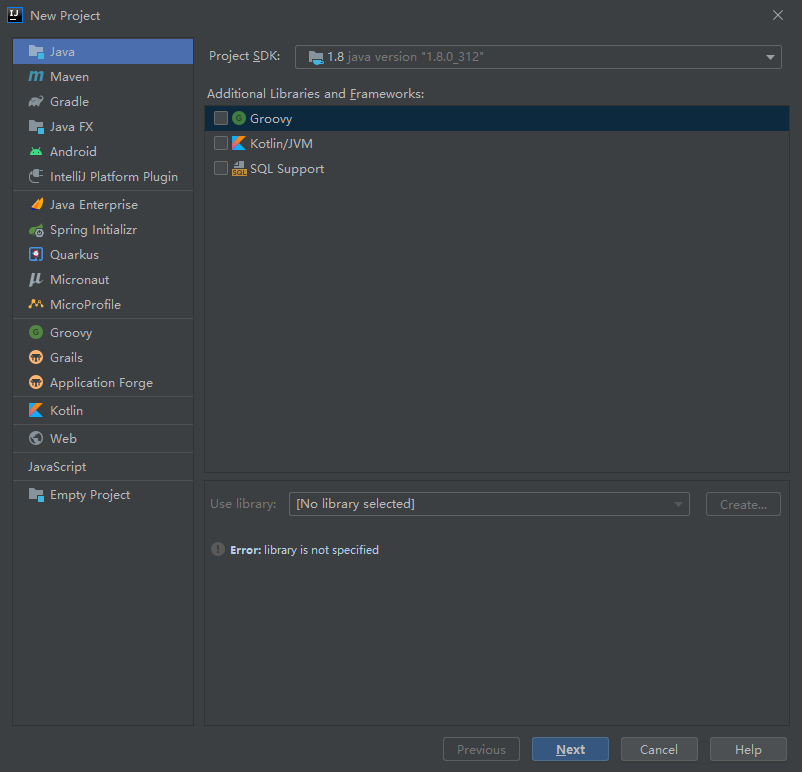
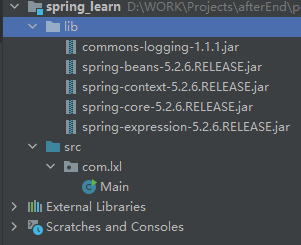
创建普通工程
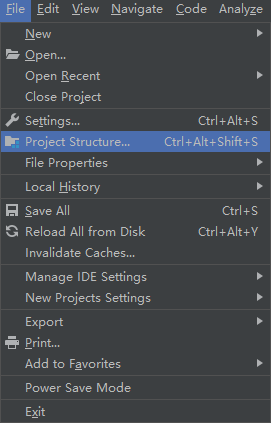
新建项目
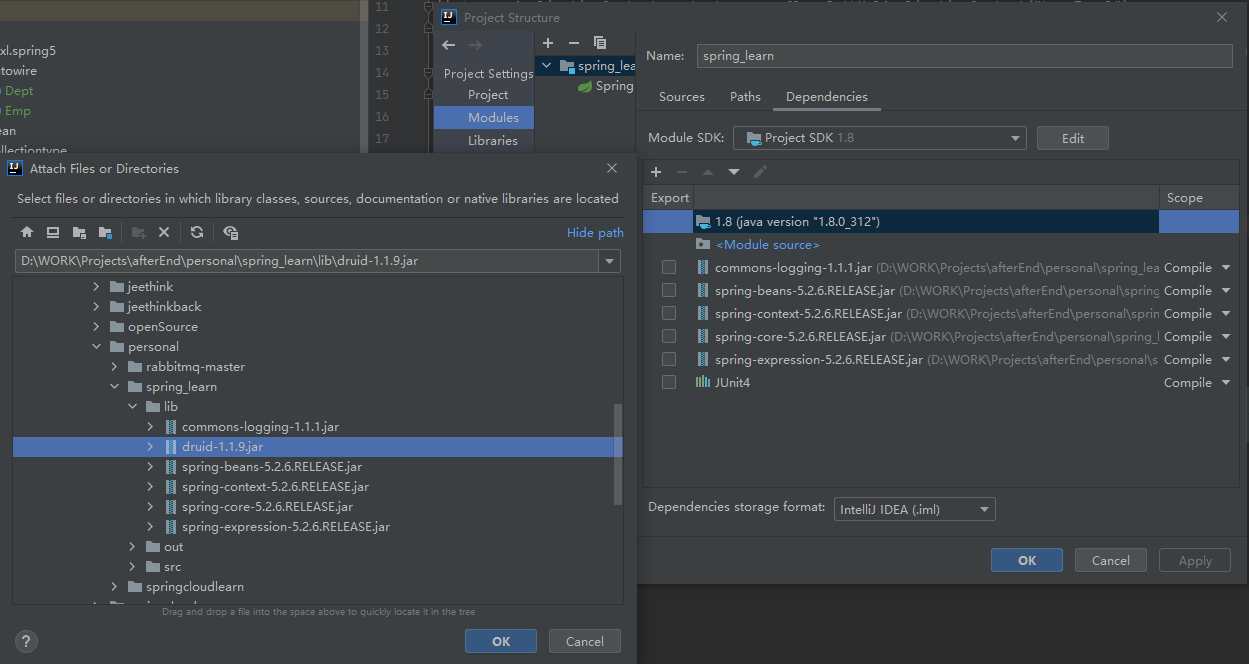
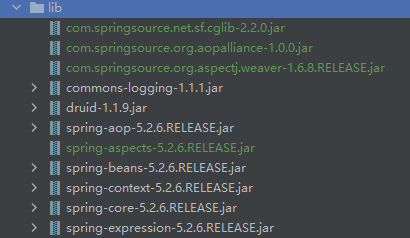
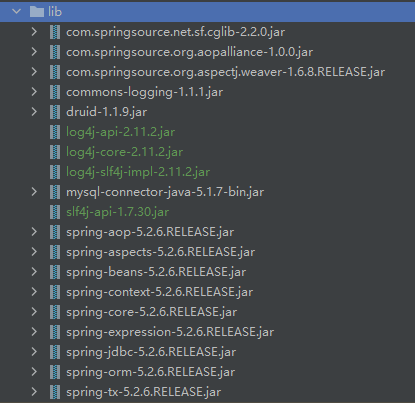
引入依赖
对应 Core中四个包引入,以及commons-logging-1.1.1.jar

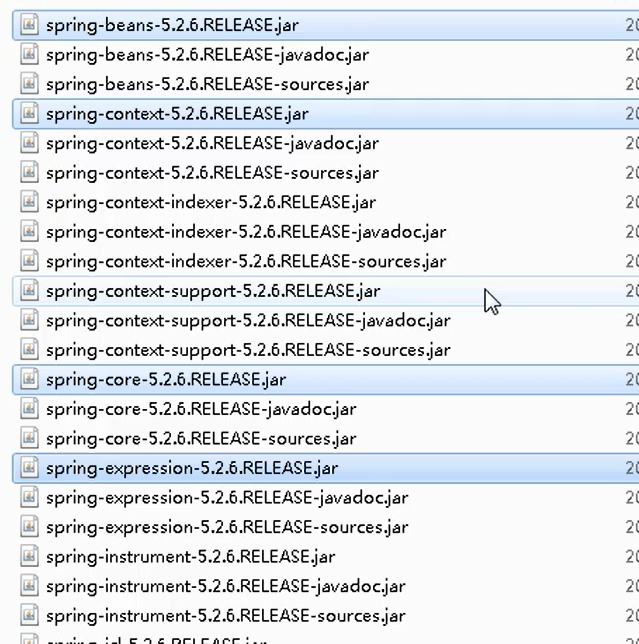

新建lib文件夹并引入jar包
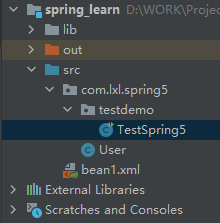
创建测试类
public class User {
    public void Add(){
        System.out.println("add.......");
    }
}
创建XML

\<?xml version="1.0" encoding="UTF-8"?>
\<beans xmlns="http://www.springframework.org/schema/beans"
       xmlns:xsi="http://www.w3.org/2001/XMLSchema-instance"
       xsi:schemaLocation="http://www.springframework.org/schema/beans http://www.springframework.org/schema/beans/spring-beans.xsd">

    <!--配置User对象创建-->
    \<bean id="user" class="com.lxl.spring5.User">\</bean>

\</beans>
测试代码
package com.lxl.spring5.testdemo;

import com.lxl.spring5.User;
import org.junit.Test;
import org.springframework.context.ApplicationContext;
import org.springframework.context.support.ClassPathXmlApplicationContext;
import org.springframework.context.support.FileSystemXmlApplicationContext;

public class TestSpring5 {
    @Test
    public void testAdd(){
//1 加载 spring 配置文件
//      ClassPathXmlApplicationContext()  	web src 下配置文件
//        FileSystemXmlApplicationContext()   指定盘符路径配置文件
        ApplicationContext context =
                new  ClassPathXmlApplicationContext("bean1.xml");
        //2 获取配置创建的对象,user为配置文件中id
        User user = context.getBean("user", User.class);
        System.out.println(user);
        user.add();

    }
}

结果:
com.intellij.rt.junit.JUnitStarter -ideVersion5 com.lxl.spring5.testdemo.TestSpring5,testAdd
com.lxl.spring5.User@46daef40
add.......

Process finished with exit code 0
IOC【Inversion of Control】
概念原理
概念
(1) 控制反转,把对象创建和对象之间的调用过程,交给 Spring 进行管理
(2) 使用 IOC 目的:为了耦合度降低(改)
(3) 上面入门案例就是 IOC 实现
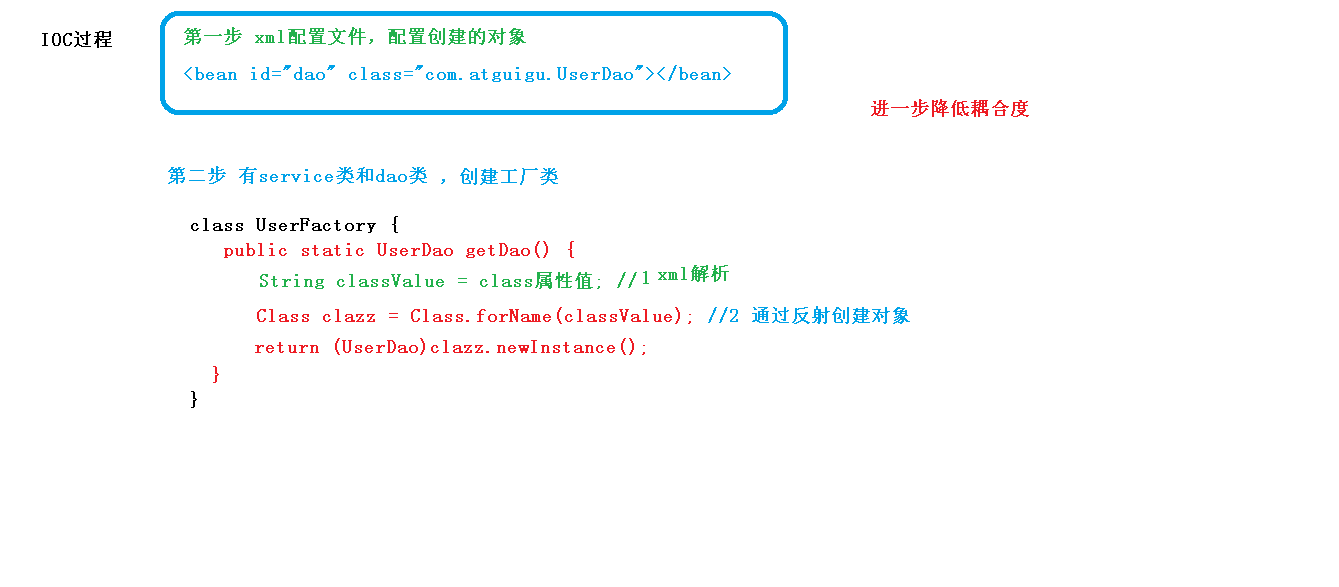
原理
xml 解析、工厂模式、反射
底层
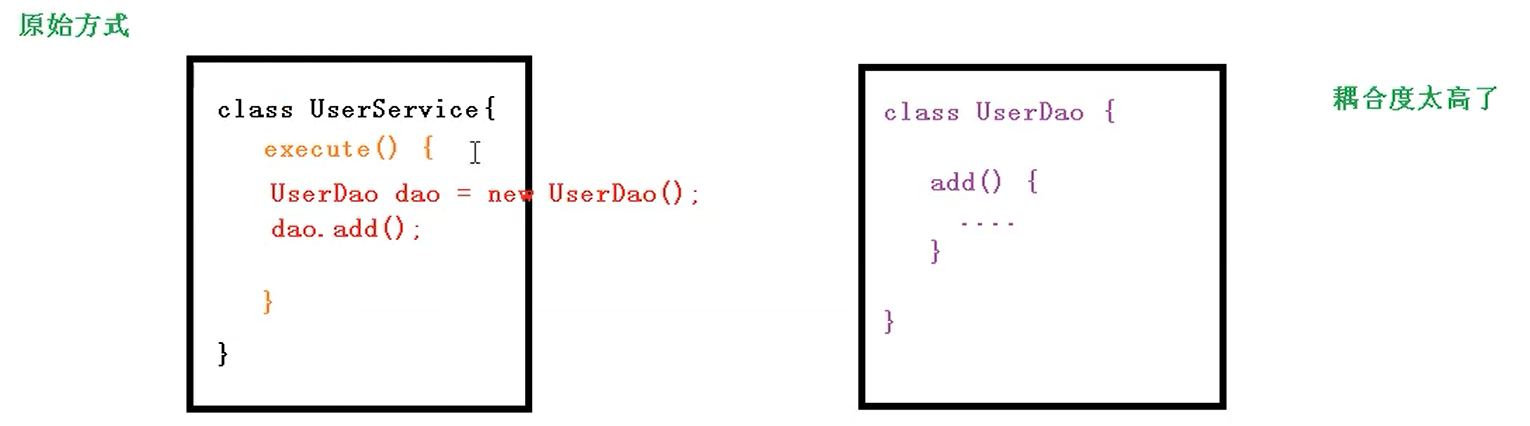
优化1
new对象---》工厂模式创建(让创建类与被创建类不耦合,比如被创建类地址改变创建类必须改变)

优化2
解析XML--》反射创建对象
IOC容器
1、IOC思想基于IOC容器完成,IOC容器底层就是对象工厂
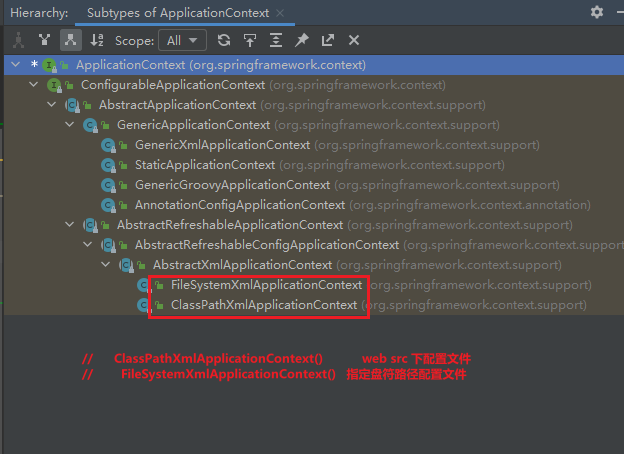
2、Spring提供IOC容器实现两种方式:(两个接口)
(1)BeanFactory:IOC容器基本实现,是Spring内部的使用接口,不提供开发人员进行使用。加载配置文件时候不创建对象,在获取对象(使用)才去创建对象
(2)ApplicationContext:BeanFactory接口的子接口,提供更多更强大的功能,一般由开发人员进行使用。加载配置文件时候就会把在配置文件对象进行创建,服务器启动时,对web运行时效果更好。
查看实现类(Ctrl+H)
ApplicationContext:
IOC操作Bean管理
1、什么是Bean管理
Bean管理指的是两个操作
(1)Spring创建对象
(2)Spirng注入属性
2、Bean管理操作有两种方式
(1)xml配置文件方式
1、基于xml方式创建对象
\<?xml version="1.0" encoding="UTF-8"?>
\<beans xmlns="http://www.springframework.org/schema/beans"
       xmlns:xsi="http://www.w3.org/2001/XMLSchema-instance"
       xsi:schemaLocation="http://www.springframework.org/schema/beans http://www.springframework.org/schema/beans/spring-beans.xsd">

    <!--配置User对象创建
    (1)在spring配置文件中,使用bean标签,标签里面添加对应属性,就可以实现对象创建
    (2)在bean标签有很多属性,介绍常用的属性
    * id属性:唯一标识,不可加特殊字符
    * name :唯一表示,可加特殊字符
    * class属性:类全路径(包类路径)
    (3)创建对象时候,默认也是执行无参数构造方法完成对象创建
    -->
    \<bean id="user" class="com.lxl.spring5.User">\</bean>

\</beans>
2、基于xml方式注入属性
DI:依赖注入,就是注入属性,IOC的一种具体实现,注入属性需要在创建对象的基础之上完成。
2.1set方法进行注入
- 创建类,定义属性和对应的set方法
public class Book {
    //创建属性
    private String bname;
    private String bauthor;


    //set方法进行注入属性
    public void setBname(String bname) {
        this.bname = bname;
    }

    public void setBauthor(String bauthor) {
        this.bauthor = bauthor;
    }
}- 在spring配置文件配置对象创建,配置属性注入
<!--=========================set方法注入属性=============================================-->
    <!--2 set方法注入属性-->
    \<bean id="book" class="com.lxl.spring5.Book">
        <!--使用property完成属性注入 name:类里面属性名称 value:向属性注入的值 -->
        \<property name="bname" value="易筋经">\</property>
        \<property name="bauthor" value="达摩老祖">\</property>
    \</bean>
2.2有参数构造进行注入
- 创建类,定义属性,创建属性对应有参数构造方法
/**
 * 使用有参数构造注入
 */
public class Orders {
    //属性
    private String oname;
    private String address;

    //有参数构造
    public Orders(String oname, String address) {
        this.oname = oname;
        this.address = address;
    }

    public void ShowOrder() {
        System.out.println(oname+"::"+address);
    }
}
配置文件创建对象,有参注入属性
<!--==========================有参构造注入===========================================-->
    <!--3 有参构造注入-->
    \<bean id="orders" class="com.lxl.spring5.Orders">
<!--        \<constructor-arg index="0" value=""/>  效果同下-->
        \<constructor-arg name="oname" value="电脑">\</constructor-arg>
<!--        \<constructor-arg index="1" value=""/>-->
        \<constructor-arg name="address" value="China">\</constructor-arg>
    \</bean>
2.3p名称空间注入
使用p名称空间注入,可以简化基于xml配置方式
第一步 添加p名称空间在配置文件中
\<beans xmlns="http://www.springframework.org/schema/beans"
       xmlns:p="http://www.springframework.org/schema/p"
       xmlns:xsi="http://www.w3.org/2001/XMLSchema-instance"
       xsi:schemaLocation="http://www.springframework.org/schema/beans http://www.springframework.org/schema/beans/spring-beans.xsd">
第二步 进行属性注入,在bean标签里面进行操作
<!--=========================set方法注入属性=============================================-->
    <!--2 set方法注入属性-->
    \<bean id="book" class="com.lxl.spring5.Book">
        <!--使用property完成属性注入 name:类里面属性名称 value:向属性注入的值 -->
        \<property name="bname" value="易筋经">\</property>
        \<property name="bauthor" value="达摩老祖">\</property>
    \</bean>


<!--2.1 p名称空间注入方式,已达到简化目的-->
\<bean id="book" class="com.lxl.spring5.Book" p:bname="易筋经" p:bauthor="达摩老祖">\</bean>
2.4xml注入其他类型属性
**字面量:**属性设置的固定值。
- null值 : <property name="bname"
value="易筋经"> <null/> </property> - 包含特殊符号:<property name="bname" value="<<易筋经>>"></property> 解决:转义、特殊内容写到<![CDATA[<<易筋经>>]]> 即:<property name="bname"><value><![CDATA[<<易筋经>>]]> </value></property>
注入属性-外部bean
(1)创建两个类 service类和dao类
(2)在service调用dao里面的方法
package com.lxl.spring5.service;


import com.lxl.spring5.dao.UserDao;
import com.lxl.spring5.dao.UserDaoImpl;

public class UserService {
    //创建UserDao类型属性,生成set方法
    private UserDao userDao;

        public void setUserDao(UserDao userDao) {
        this.userDao = userDao;
    }


    public void add() {
        System.out.println("service add...............");
        //    原始创建对象
//        UserDao userDao = new UserDaoImpl();
//        userDao.update();


    }
}
package com.lxl.spring5.dao;
/**
* @author Administrator
*/
public interface UserDao {
public void update();
}package com.lxl.spring5.dao;
public class UserDaoImpl implements UserDao{
@Override
public void update() {
System.out.println("dao update--------");
}
}(3)在spring配置文件中进行配置
\<?xml version="1.0" encoding="UTF-8"?>
\<beans xmlns="http://www.springframework.org/schema/beans"
       xmlns:xsi="http://www.w3.org/2001/XMLSchema-instance"
       xsi:schemaLocation="http://www.springframework.org/schema/beans http://www.springframework.org/schema/beans/spring-beans.xsd">
    <!--1 service和dao对象创建-->
    \<bean id="userService" class="com.lxl.spring5.service.UserService">
        <!--注入userDao对象
        name属性:类里面属性名称
        ref属性:创建userDao对象bean标签id值 -->
        \<property name="userDao" ref="userDaoImpl">\</property>
    \</bean>
    \<bean id="userDaoImpl" class="com.lxl.spring5.dao.UserDaoImpl">\</bean>
\</beans>
(4)测试
    @Test
    public void testAdd(){
//1 加载 spring 配置文件
//      ClassPathXmlApplicationContext()  web src 下配置文件
//        FileSystemXmlApplicationContext()   指定路径配置文件
        ApplicationContext context =
                new  ClassPathXmlApplicationContext("bean2.xml");
        //2 获取配置创建的对象,user为配置文件中id
        UserService userService = context.getBean("userService", UserService.class);
        System.out.println(userService);
        userService.add();

    }
注入属性-内部bean
当一个bean仅被用作另一个bean的属性时,它能被声明为一个内部bean,为了定义innerbean,在Spring的基于XML的配置元数据中,可以在<property/>或<constructor-arg/>元素内使用<bean/>元素,内部bean通常是匿名的,它们的Scope一般是prototype
(1)一对多两个类:
package com.lxl.spring5.bean;

//员工类
public class Emp {
    private String ename;
    private String gender;
    //一对多
    //员工属于某一个部门,使用对象形式表示
    private Dept dept;

    public void setDept(Dept dept) {
        this.dept = dept;
    }

    public void setEname(String ename) {
        this.ename = ename;
    }

    public void setGender(String gender) {
        this.gender = gender;
    }
public void add(){
    System.out.println(ename+"::"+gender+"::"+dept);
}
}
package com.lxl.spring5.bean;
//部门类
public class Dept {
private String dname;
public void setDname(String dname) {
this.dname = dname;
}
@Override
public String toString() {
return "Dept{" +
"dname='" + dname + '\'' +
'}';
}
}(2)xml配置
<!--+++++++++++++++++++注入属性-内部bean:一对多+++++++++++++++++++++++-->
    <!--内部bean-->
    \<bean id="emp" class="com.lxl.spring5.bean.Emp"> <!--设置两个普通属性-->
        \<property name="ename" value="lucy">\</property>
        \<property name="gender" value="女">\</property> <!--设置对象类型属性-->
        \<property name="dept">
            \<bean id="dept" class="com.lxl.spring5.bean.Dept">
                \<property name="dname" value="安保部">\</property>
            \</bean>
        \</property>
    \</bean>
(3)测试:
    @Test
    public void testOneToMore(){
//1 加载 spring 配置文件
//      ClassPathXmlApplicationContext()  web src 下配置文件
//        FileSystemXmlApplicationContext()   指定路径配置文件
        ApplicationContext context =
                new  ClassPathXmlApplicationContext("bean3.xml");
        //2 获取配置创建的对象,user为配置文件中id
        Emp emp = context.getBean("emp", Emp.class);
        System.out.println(emp);
        emp.add();

    }
注入属性-级联赋值两种方式
  <!--    +++++++++++++++++++ 级联赋值两种方式 +++++++++++++++++++++++-->
    <!--级联赋值   方式一 -->
    \<bean id="emp" class="com.lxl.spring5.bean.Emp"> <!--设置两个普通属性-->
        \<property name="ename" value="lucy">\</property>
        \<property name="gender" value="女">\</property> <!--级联赋值-->
        \<property name="dept" ref="dept">\</property>
    \</bean>
    \<bean id="dept" class="com.lxl.spring5.bean.Dept">
        \<property name="dname" value="财务部">\</property>
    \</bean>


    <!--级联赋值   方式二 -->
<!--    设置两个普通属性 dept.dname方式需要添加dept的get方法 -->
<!--    \<bean id="emp" class="com.lxl.spring5.bean.Emp"> -->
<!--        \<property name="ename" value="lucy">\</property>-->
<!--        \<property name="gender" value="女">\</property> -->
<!--        \<property name="dept" ref="dept">\</property>-->
<!--        \<property name="dept.dname" value="技术部">\</property>-->
<!--    \</bean>-->
<!--    \<bean id="dept" class="com.lxl.spring5.bean.Dept">-->
<!--        \<property name="dname" value="财务部">\</property>-->
<!--    \</bean>-->
2.5xml注入集合类属性
(1)创建类,定义数组、list、map、set类型属性,生成对应set方法
package com.lxl.spring5.collectiontype;

import java.util.Arrays;
import java.util.List;
import java.util.Map;
import java.util.Set;

public class Stu {
    //1 数组类型属性
    private String[] courses;
    //2 list集合类型属性
    private List\<String> list;
    //3 map集合类型属性
    private Map\<String, String> maps;
    //4 set集合类型属性
    private Set\<String> sets;

    public void setSets(Set\<String> sets) {
        this.sets = sets;
    }

    public void setCourses(String[] courses) {
        this.courses = courses;
    }

    public void setList(List\<String> list) {
        this.list = list;
    }

    public void setMaps(Map\<String, String> maps) {
        this.maps = maps;
    }

    public void test(){
        System.out.println(Arrays.toString(courses));
        System.out.println(list);
        System.out.println(maps);
        System.out.println(sets);
    }
}
(2)xml配置
\<?xml version="1.0" encoding="UTF-8"?>
\<beans xmlns="http://www.springframework.org/schema/beans"
       xmlns:xsi="http://www.w3.org/2001/XMLSchema-instance"
       xsi:schemaLocation="http://www.springframework.org/schema/beans http://www.springframework.org/schema/beans/spring-beans.xsd">
    <!--    +++++++++++++++++++ 集合类属性注入 +++++++++++++++++++++++-->
    <!--1 集合类型属性注入-->
    \<bean id="stu" class="com.lxl.spring5.collectiontype.Stu"> <!--数组类型属性注入-->
        \<property name="courses">
            \<array>
                \<value>java课程\</value>
                \<value>数据库课程\</value>
            \</array>
        \</property>
        <!--list类型属性注入-->
        \<property name="list">
            \<list>
                \<value>张三\</value>
                \<value>小三\</value>
            \</list>
        \</property> <!--map类型属性注入-->
        \<property name="maps">
            \<map>
                \<entry key="JAVA" value="java">\</entry>
                \<entry key="PHP" value="php">\</entry>
            \</map>
        \</property> <!--set类型属性注入-->
        \<property name="sets">
            \<set>
                \<value>MySQL\</value>
                \<value>Redis\</value>
            \</set>
        \</property>
    \</bean>
\</beans>
(3)测试
package com.lxl.spring5.testdemo;

import com.lxl.spring5.bean.Emp;
import com.lxl.spring5.collectiontype.Stu;
import org.junit.Test;
import org.springframework.context.ApplicationContext;
import org.springframework.context.support.ClassPathXmlApplicationContext;

public class TestCollection {
    @Test
    public void testOneToMore(){
//1 加载 spring 配置文件
//      ClassPathXmlApplicationContext()  web src 下配置文件
//        FileSystemXmlApplicationContext()   指定路径配置文件
        ApplicationContext context =
                new ClassPathXmlApplicationContext("bean5.xml");
        //2 获取配置创建的对象,user为配置文件中id
        Stu stu = context.getBean("stu", Stu.class);
        stu.test();

    }
}
2.6在集合里面设置对象类型值
package com.lxl.spring5.collectiontype;

import java.util.Arrays;
import java.util.List;
import java.util.Map;
import java.util.Set;

public class Stu {
    //1 数组类型属性
    private String[] courses;
    //2 list集合类型属性
    private List\<String> list;
    //3 map集合类型属性
    private Map\<String, String> maps;
    //4 set集合类型属性
    private Set\<String> sets;
	//5 List集合中为对象类型属性
    private List\<Course> courseList;

    public void setCourseList(List\<Course> courseList) {
        this.courseList = courseList;
    }

    public void setSets(Set\<String> sets) {
        this.sets = sets;
    }

    public void setCourses(String[] courses) {
        this.courses = courses;
    }

    public void setList(List\<String> list) {
        this.list = list;
    }

    public void setMaps(Map\<String, String> maps) {
        this.maps = maps;
    }

    public void test(){
        System.out.println(Arrays.toString(courses));
        System.out.println(list);
        System.out.println(maps);
        System.out.println(sets);
        System.out.println(courseList);
    }
}
package com.lxl.spring5.collectiontype;
public class Course {
private String cname;
public void setCname(String cname) {
this.cname = cname;
}
@Override
public String toString() {
return "Course{" +
"cname='" + cname + '\'' +
'}';
}
}\<?xml version="1.0" encoding="UTF-8"?>
\<beans xmlns="http://www.springframework.org/schema/beans"
xmlns:xsi="http://www.w3.org/2001/XMLSchema-instance"
xsi:schemaLocation="http://www.springframework.org/schema/beans http://www.springframework.org/schema/beans/spring-beans.xsd">
<!-- +++++++++++++++++++ 集合类属性注入、集合内为对象情况注入 +++++++++++++++++++++++-->
<!--1 集合类型属性注入-->
\<bean id="stu" class="com.lxl.spring5.collectiontype.Stu"> <!--数组类型属性注入-->
\<property name="courses">
\<array>
\<value>java课程\</value>
\<value>数据库课程\</value>
\</array>
\</property>
<!--list类型属性注入-->
\<property name="list">
\<list>
\<value>张三\</value>
\<value>小三\</value>
\</list>
\</property> <!--map类型属性注入-->
\<property name="maps">
\<map>
\<entry key="JAVA" value="java">\</entry>
\<entry key="PHP" value="php">\</entry>
\</map>
\</property> <!--set类型属性注入-->
\<property name="sets">
\<set>
\<value>MySQL\</value>
\<value>Redis\</value>
\</set>
\</property>
<!--注入list集合类型,值是对象-->
\<property name="courseList">
\<list>
\<ref bean="course1">\</ref>
\<ref bean="course2">\</ref>
\</list>
\</property>
\</bean>
\<bean id="course1" class="com.lxl.spring5.collectiontype.Course">
\<property name="cname" value="Spring5框架">\</property>
\</bean>
\<bean id="course2" class="com.lxl.spring5.collectiontype.Course">
\<property name="cname" value="MyBatis框架">\</property>
\</bean>
\</beans>把集合注入部分提取出来
package com.lxl.spring5.collectiontype;

import java.util.List;

public class Book {
    private List\<String> list;

    public void setList(List\<String> list) {
        this.list = list;
    }
    public void test() {
        System.out.println(list);
    }
}\<?xml version="1.0" encoding="UTF-8"?>
\<beans xmlns="http://www.springframework.org/schema/beans"
xmlns:util="http://www.springframework.org/schema/util"
xmlns:xsi="http://www.w3.org/2001/XMLSchema-instance"
xsi:schemaLocation="http://www.springframework.org/schema/beans http://www.springframework.org/schema/beans/spring-beans.xsd
http://www.springframework.org/schema/util http://www.springframework.org/schema/util/spring-util.xsd">
<!-- +++++++++++++++++++ 集合内为对象情况注入 +++++++++++++++++++++++-->
<!--1 加util元空间
xmlns:util="http://www.springframework.org/schema/util"
http://www.springframework.org/schema/util http://www.springframework.org/schema/util/spring-util.xsd
-->
<!--2 提取list集合类型属性注入-->
\<util:list id="bookList">
\<value>易筋经\</value>
\<value>九阴真经\</value>
\<value>九阳神功\</value>
\</util:list> <!--3 提取list集合类型属性注入使用-->
\<bean id="book" class="com.lxl.spring5.collectiontype.Book">
\<property name="list" ref="bookList">\</property>
\</bean>
\</beans>测试类
package com.lxl.spring5.testdemo;

import com.lxl.spring5.collectiontype.Book;
import com.lxl.spring5.bean.Emp;
import com.lxl.spring5.collectiontype.Stu;
import org.junit.Test;
import org.springframework.context.ApplicationContext;
import org.springframework.context.support.ClassPathXmlApplicationContext;

public class TestCollection {
    @Test
    public void testOneToMore(){
//1 加载 spring 配置文件
//      ClassPathXmlApplicationContext()  web src 下配置文件
//        FileSystemXmlApplicationContext()   指定路径配置文件
        ApplicationContext context =
                new ClassPathXmlApplicationContext("bean5.xml");
        //2 获取配置创建的对象,user为配置文件中id
        Stu stu = context.getBean("stu", Stu.class);
        stu.test();

    }
    @Test
    public void testOneToMore1(){
//1 加载 spring 配置文件
//      ClassPathXmlApplicationContext()  web src 下配置文件
//        FileSystemXmlApplicationContext()   指定路径配置文件
        ApplicationContext context =
                new ClassPathXmlApplicationContext("bean6.xml");
        //2 获取配置创建的对象,user为配置文件中id
        Book book = context.getBean("book", Book.class);
        book.test();

    }
}
2.7FactoryBean
1、Spring有两种类型bean,一种普通bean,另外一种工厂bean(FactoryBean)
2、普通bean:在配置文件中定义bean类型就是返回类型
3、工厂bean:在配置文件定义bean类型可以和返回类型不一样
第一步 创建类,让这个类作为工厂bean,实现接口 FactoryBean
第二步 实现接口里面的方法,在实现的方法中定义返回的bean类型
package com.lxl.spring5.factorybean;

import com.lxl.spring5.collectiontype.Course;
import org.springframework.beans.factory.FactoryBean;

/**FactoryBean*/
public class MyBean implements FactoryBean\<Course> {

    /**定义返回bean类型*/
    @Override
    public Course getObject() throws Exception {
        Course course=new Course();
        course.setCname("体育课");
        return course;
    }

    @Override
    public Class\<?> getObjectType() {
        return null;
    }

    @Override
    public boolean isSingleton() {
        return FactoryBean.super.isSingleton();
    }
}\<bean id="myBean" class="com.lxl.spring5.factorybean.MyBean">
\</bean> @Test
public void testFactoryBean(){
ApplicationContext context =
new ClassPathXmlApplicationContext("bean7.xml");
//2 获取配置创建的对象,user为配置文件中id
// MyBean myBean = context.getBean("myBean", MyBean.class);
Course myBean = context.getBean("myBean", Course.class);
System.out.println(myBean);
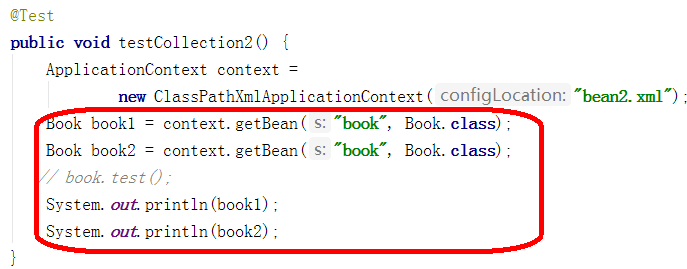
}2.8 bean 作用域
1、在Spring里面,设置创建bean实例是单实例还是多实例
2、在Spring里面,默认情况下,bean是单实例对象

3、如何设置单实例还是多实例
(1)在spring配置文件bean标签里面有属性(scope)用于设置单实例还是多实例,spring中可使用@Scope注解
(2)scope属性值
默认值,singleton,表示是单实例对象
prototype,表示是多实例对象
request:每次http请求都会创建一个bean,该作用域仅在基于web的SpringApplicationContext情形下有效。
session:在一个HTTPSession中,一个bean定义对应一个实例。该作用域仅在基于web的SpringApplicationContext情形下有效。
global-session:在一个全局的HTTPSession中,一个bean定义对应一个实例。该作用域仅在基于web的SpringApplicationContext情形下有效。


(3)singleton和prototype区别
第一 singleton单实例,prototype多实例。
第二 设置scope值是singleton时候,加载spring配置文件时候就会创建单实例对象。
设置scope值是prototype时候,不是在加载spring配置文件时候创建对象,而是在在调用getBean方法时候创建多实例对象。
2.9Bean生命周期
(1)通过构造器创建bean实例(无参数构造)
(2)为bean的属性设置值和对其他bean引用(调用set方法)
(3)调用bean的初始化的方法(需要进行配置初始化的方法)
(4)bean可以使用了(对象获取到了)
(5)当容器关闭时候,调用bean的销毁的方法(需要进行配置销毁的方法)
创建实例 ==》 根据定义填充其属性和对其他bean的引用 ==》执行bean初始化方法得到bean ==》容器关闭时销毁bean
package com.lxl.spring5.lifecyclebean;

public class Orders {
    //无参数构造
    public Orders() {
        System.out.println("第一步 执行无参数构造创建bean实例");
    }

    private String oname;

    public void setOname(String oname) {
        this.oname = oname;
        System.out.println("第二步 调用set方法设置属性值");
    }

    //创建执行的初始化的方法
    public void initMethod() {
        System.out.println("第三步 执行初始化的方法");
    }
    //创建执行的销毁的方法
    public void destroyMethod() {
        System.out.println("第五步 执行销毁的方法");
    }
}
<!-- +++++++++++++++++++bean生命周期+++++++++++++++++++++++-->
\<bean id="orders" class="com.lxl.spring5.lifecyclebean.Orders" init-method="initMethod" destroy-method="destroyMethod">
\<property name="oname" value="键盘">\</property>
\</bean> @Test
public void TestLifeCycle(){
// ApplicationContext context = new ClassPathXmlApplicationContext("bean7.xml");
// ClassPathXmlApplicationContext 为ApplicationContext子实现类
ClassPathXmlApplicationContext context = new ClassPathXmlApplicationContext("bean8.xml");
//2 获取配置创建的对象,user为配置文件中id
// MyBean myBean = context.getBean("myBean", MyBean.class);
Orders myBean = context.getBean("orders", Orders.class);
System.out.println("第四步 获取创建的bean实例");
System.out.println(myBean);
context.close();
}2.10后置处理器
package com.lxl.spring5.lifecyclebean;

import org.springframework.beans.BeansException;
import org.springframework.beans.factory.config.BeanPostProcessor;

public class BeforeAfter implements BeanPostProcessor {
    @Override
    public Object postProcessBeforeInitialization(Object bean, String beanName) throws BeansException {
        System.out.println("后置处理器:在初始化之前执行的方法");
        return BeanPostProcessor.super.postProcessBeforeInitialization(bean, beanName);
    }

    @Override
    public Object postProcessAfterInitialization(Object bean, String beanName) throws BeansException {
        System.out.println("后置处理器:在初始化之后执行的方法");
        return BeanPostProcessor.super.postProcessAfterInitialization(bean, beanName);
    }
}
<!--+++++++++++++++++++bean生命周期、后置处理器+++++++++++++++++++++++-->
\<bean id="orders" class="com.lxl.spring5.lifecyclebean.Orders" init-method="initMethod" destroy-method="destroyMethod">
\<property name="oname" value="键盘">\</property>
\</bean>
<!--后置处理器 ,在此配置文件中的所有bean添加后置处理器-->
\<bean id="myBeanPost" class="com.lxl.spring5.lifecyclebean.BeforeAfter">\</bean>2.12自动装配
有五种自动装配的方式,可以用来指导Spring容器用自动装配方式来进行依赖注入。
- no:默认的方式是不进行自动装配,通过显式设置ref属性来进行装配。
- byName:通过参数名自动装配,Spring容器在配置文件中发现bean的autowire属性被设置成byname,之后容器试图匹配、装配和该bean的属性具有相同名字的bean。
- byType::通过参数类型自动装配,Spring容器在配置文件中发现bean的autowire属性被设置成byType,之后容器试图匹配、装配和该bean的属性具有相同类型的bean。如果有多个bean符合条件,则抛出错误。
- constructor:这个方式类似于byType,但是要提供给构造器参数,如果没有确定的带参数的构造器参数类型,将会抛出异常。
- autodetect:首先尝试使用constructor来自动装配,如果无法工作,则使用byType方式。
package com.lxl.spring5.autowire;

/**
 * @author Administrator
 */
public class Dept {
    @Override
    public String toString() {
        return "Dept{}";
    }
}
package com.lxl.spring5.testdemo;
import com.lxl.spring5.autowire.Emp;
import com.lxl.spring5.lifecyclebean.Orders;
import org.junit.Test;
import org.springframework.context.support.ClassPathXmlApplicationContext;
public class TestAutoWire {
@Test
public void TestLifeCycle(){
// ApplicationContext context = new ClassPathXmlApplicationContext("bean7.xml");
// ClassPathXmlApplicationContext 为ApplicationContext子实现类
ClassPathXmlApplicationContext context = new ClassPathXmlApplicationContext("bean9.xml");
//2 获取配置创建的对象,user为配置文件中id
// MyBean myBean = context.getBean("myBean", MyBean.class);
Emp emp = context.getBean("emp", Emp.class);
System.out.println(emp);
}
}\<?xml version="1.0" encoding="UTF-8"?>
\<beans xmlns="http://www.springframework.org/schema/beans"
xmlns:util="http://www.springframework.org/schema/util"
xmlns:xsi="http://www.w3.org/2001/XMLSchema-instance"
xsi:schemaLocation="http://www.springframework.org/schema/beans http://www.springframework.org/schema/beans/spring-beans.xsd
http://www.springframework.org/schema/util http://www.springframework.org/schema/util/spring-util.xsd">
<!--+++++++++++++++++++自动装配 autowire="byName/byType"+++++++++++++++++++++++-->
<!--实现自动装配 bean标签属性autowire,配置自动装配 autowire属性常用两个值: byName根据属性名称注入 ,注入值bean的id值和类属性名称一样,如下dept1不会注入。 byType根据属性类型注入 -->
\<bean id="emp" class="com.lxl.spring5.autowire.Emp" autowire="byName">
<!-- Could not autowire. There is more than one bean of 'Dept' type. Beans: dept,dept1. Properties: 'dept'-->
<!-- \<bean id="emp" class="com.lxl.spring5.autowire.Emp" autowire="byType">-->
<!-- 原始模式-->
<!-- \<property name="dept" ref="dept">\</property>-->
\</bean>
<!--后置处理器 ,在此配置文件中的所有bean添加后置处理器-->
\<bean id="dept" class="com.lxl.spring5.autowire.Dept">\</bean>
\<bean id="dept1" class="com.lxl.spring5.autowire.Dept">\</bean>
\</beans>测试
package com.lxl.spring5.testdemo;

import com.lxl.spring5.autowire.Emp;
import com.lxl.spring5.lifecyclebean.Orders;
import org.junit.Test;
import org.springframework.context.support.ClassPathXmlApplicationContext;

public class TestAutoWire {
    @Test
    public void TestLifeCycle(){
//        ApplicationContext context = new  ClassPathXmlApplicationContext("bean7.xml");
//        ClassPathXmlApplicationContext 为ApplicationContext子实现类
        ClassPathXmlApplicationContext context = new  ClassPathXmlApplicationContext("bean9.xml");
        //2 获取配置创建的对象,user为配置文件中id
//        MyBean myBean = context.getBean("myBean", MyBean.class);
        Emp emp = context.getBean("emp", Emp.class);
        System.out.println(emp);

    }
}2.13引入外部属性文件
1、直接配置数据库信息
(1)配置德鲁伊连接池
(2)引入德鲁伊连接池依赖jar包
复制到lib文件夹并添加项目依赖
\<?xml version="1.0" encoding="UTF-8"?>
\<beans xmlns="http://www.springframework.org/schema/beans"
       xmlns:util="http://www.springframework.org/schema/util"
       xmlns:p="http://www.springframework.org/schema/p"
       xmlns:context ="http://www.springframework.org/schema/context"
       xmlns:xsi="http://www.w3.org/2001/XMLSchema-instance"
       xsi:schemaLocation="http://www.springframework.org/schema/beans http://www.springframework.org/schema/beans/spring-beans.xsd
       http://www.springframework.org/schema/util http://www.springframework.org/schema/util/spring-util.xsd
       http://www.springframework.org/schema/context http://www.springframework.org/schema/context/spring-context.xsd">
    <!--+++++++++++++++++++引入外部属性文件,数据库连接池示例+++++++++++++++++++++++-->


    <!--        原始形式,固定值-->
<!--    \<bean id="dept1" class="com.alibaba.druid.pool.DruidDataSource">-->
<!--        \<property name="driverClassName" value="com.mysql.jdbc.Driver">\</property>-->
<!--        \<property name="url" value="jdbc:mysql://localhost:3306/userDb">\</property>-->
<!--        \<property name="username" value="root">\</property>-->
<!--        \<property name="password" value="root">\</property>-->
<!--        引入外部文件-->
<!--    \</bean>-->

<!--    引入外部文件形式-->
<!--    引入外部文件-->
    \<context:property-placeholder location="classpath:jdbc.properties"/>
<!--    配置连接池-->
    \<bean id="dept1" class="com.alibaba.druid.pool.DruidDataSource">
        \<property name="driverClassName" value="${prop.driverClass}">\</property>
        \<property name="url" value="${prop.url}">\</property>
        \<property name="username" value="${prop.userName}">\</property>
        \<property name="password" value="${prop.password}">\</property>
    \</bean>
\</beans>
jdbc.properties
prop.driverClass=com.mysql.jdbc.Driver
prop.url=jdbc:mysql://localhost:3306/userDb
prop.userName=root
prop.password=root
(2)注解方式
1、什么是注解
(1)注解是代码特殊标记,格式:@注解名称(属性名称=属性值, 属性名称=属性值..)
(2)使用注解,注解作用在类上面,方法上面,属性上面
(3)使用注解目的:简化xml配置
2、Spring针对Bean管理中创建对象提供注解
(1)@Component
(2)@Service
(3)@Controller
(4)@Repository
上面四个注解功能是一样的,都可以用来创建bean实例,但是习惯在不同层使用不同注解。
引入aop的jar包
类注解
package com.lxl.spring5.annotation;


import org.springframework.stereotype.Component;
import org.springframework.stereotype.Controller;
import org.springframework.stereotype.Repository;
import org.springframework.stereotype.Service;

//在注解里面value属性值可以省略不写,
// 默认值是类名称,首字母小写
// UserService -- userService
@Component(value = "userService") //等同\<bean id="userService" class=".."/>
/**
 * @author Administrator*/
//@Component
//@Service
//@Controller
//@Repository
// 四个注解效果相同,习惯用在不同层
public class UserService {
    public void add() {
        System.out.println("service add ...");
    }
}- 开启组件扫描
\<?xml version="1.0" encoding="UTF-8"?>
\<beans xmlns="http://www.springframework.org/schema/beans"
       xmlns:util="http://www.springframework.org/schema/util"
       xmlns:p="http://www.springframework.org/schema/p"
       xmlns:context="http://www.springframework.org/schema/context"
       xmlns:xsi="http://www.w3.org/2001/XMLSchema-instance"
       xsi:schemaLocation="http://www.springframework.org/schema/beans http://www.springframework.org/schema/beans/spring-beans.xsd
       http://www.springframework.org/schema/util http://www.springframework.org/schema/util/spring-util.xsd
       http://www.springframework.org/schema/context http://www.springframework.org/schema/context/spring-context.xsd">
    <!--+++++++++++++++++++注解方式,扫描包+++++++++++++++++++++++-->
    <!--添加context命名空间-->
    <!--    开启组件扫描
        1.扫描多个包,可逗号隔开
        2.扫描多个包的上层目录
    -->
    \<context:component-scan base-package="com.lxl">\</context:component-scan>


    <!--示例1 use-default-filters="false" 表示现在不使用默认filter,自己配置filter context:include-filter ,设置扫描哪些内容 -->
    \<context:component-scan base-package="com.lxl" use-default-filters="false">
        \<context:include-filter type="annotation" expression="org.springframework.stereotype.Controller"/>
    \</context:component-scan>


    <!--示例2 下面配置扫描包所有内容 context:exclude-filter: 设置哪些内容不进行扫描 -->
    \<context:component-scan base-package="com.lxl">
        \<context:exclude-filter type="annotation" expression="org.springframework.stereotype.Controller"/>
    \</context:component-scan>
\</beans>- 测试
package com.lxl.spring5.testdemo;

import com.lxl.spring5.annotation.UserService;
import org.junit.Test;
import org.springframework.context.ApplicationContext;
import org.springframework.context.support.ClassPathXmlApplicationContext;

/**
 * @author Administrator
 */
public class TestAnnotation {
    @Test
    public void testAnnotation() {
//        spring-aop-4.3.10.RELEASE 包未导入会报错:Unexpected exception parsing XML document from class path resource
        ApplicationContext applicationContext=new ClassPathXmlApplicationContext("bean11.xml");
        UserService userService = applicationContext.getBean("userService", UserService.class);
        userService.add();
    }
}
3.纯注解开发
添加配置类扫描包
package com.lxl.spring5.annotation.allbyannotation.config;

import org.springframework.context.annotation.ComponentScan;
import org.springframework.context.annotation.Configuration;

@Configuration
@ComponentScan(basePackages = {"com.lxl.spring5.annotation.allbyannotation"})
public class SpringConfig {

}
测试
package com.lxl.spring5.testdemo;
import com.lxl.spring5.annotation.allbyannotation.config.SpringConfig;
import com.lxl.spring5.annotation.allbyannotation.service.UserService1;
import org.junit.Test;
import org.springframework.context.ApplicationContext;
import org.springframework.context.annotation.AnnotationConfigApplicationContext;
import org.springframework.context.support.ClassPathXmlApplicationContext;
public class TestAllByAnnotation {
@Test
public void testAllByAnnotation(){
//加载配置类
ApplicationContext context = new AnnotationConfigApplicationContext(SpringConfig.class);
UserService1 userService1 = context.getBean("userService1", UserService1.class);
userService1.add();
}
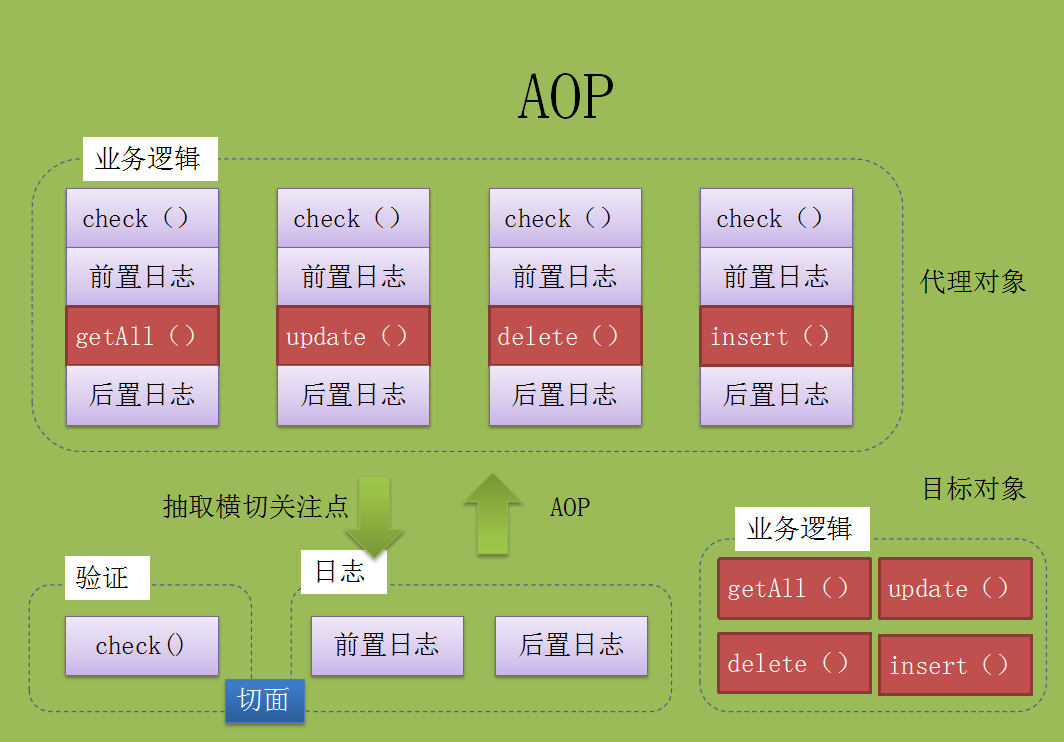
}AOP【Aspect Oriented Programming】
AOP介绍
1、什么是AOP
(1)面向切面编程(方面),利用AOP可以对业务逻辑的各个部分进行隔离,从而使得业务逻辑各部分之间的耦合度降低,提高程序的可重用性,同时提高了开发的效率。
(2)通俗描述:不通过修改源代码方式,在主干功能里面添加新功能、比如登录的权限过滤。
AOP底层原理
1、AOP底层使用动态代理的两种情况:
第一种 有接口情况,使用JDK动态代理
⚫ 创建接口实现类代理对象,增强类的方法
第二种 没有接口情况,使用CGLIB动态代理
⚫ 创建子类的代理对象,增强类的方法
AOP JDK 动态代理
1、使用JDK动态代理,使用Proxy类里面的方法创建代理对象
(1)创建接口,定义方法
package com.lxl.spring5.aop.jdkdynamicproxy;

public interface UserDao {
    public int add(int a, int b);

    public String update(String id);

}
(2)创建接口实现类,实现方法
package com.lxl.spring5.aop.jdkdynamicproxy;

public class UserDaoImpl implements UserDao {
    @Override
    public int add(int a, int b) {
        return a + b;
    }

    @Override
    public String update(String id) {
        return id;
    }
}
(3)使用Proxy类创建接口代理对象
package com.lxl.spring5.aop.jdkdynamicproxy;

import java.lang.reflect.InvocationHandler;
import java.lang.reflect.Method;
import java.lang.reflect.Proxy;
import java.util.Arrays;

/**
 * 使用Proxy创建代理对象
 */
public class JDKProxy {
    public static void main(String[] args) {
        //创建接口实现类代理对象
        Class[] interfaces = {UserDao.class};
//         getClassLoader类加载器
//         interfaces要实现的接口

//        Proxy.newProxyInstance(JDKProxy.class.getClassLoader(), interfaces, new InvocationHandler() {
//            @Override
//            public Object invoke(Object proxy, Method method, Object[] args) throws Throwable {
//                return null;
//            }
//        });
        UserDaoImpl userDao = new UserDaoImpl();
        UserDao dao = (UserDao) Proxy.newProxyInstance(JDKProxy.class.getClassLoader(), interfaces, new UserDaoProxy(userDao));
        int result = dao.add(1, 2);
        System.out.println("result:" + result);
    }
}

//创建代理对象代码
class UserDaoProxy implements InvocationHandler {

    //1 把创建的是谁的代理对象,把谁传递过来
    // 有参数构造传递代理对象
    private Object obj;

    public UserDaoProxy(Object obj) {
        this.obj = obj;
    }

    //增强的逻辑
//    invoke方法类对象创建后即被调用
    @Override
    public Object invoke(Object proxy, Method method, Object[] args) throws Throwable {
        //方法之前
        System.out.println("方法之前执行...." + method.getName() + " :传递的参数..." + Arrays.toString(args));
        // 被增强的方法执行
        Object res = method.invoke(obj, args);
        // 方法之后
        System.out.println("方法之后执行...." + obj);
        return res;
    }
}
AOP主要术语
1.连接点(Joint point)
可以被增强的程序具体的方法
2.切入点(Pointcut)
实际被增强的方法(一个或一组连接点),可通过@Pointcut注解到方法上抽取共同切入点,通过切入点表达式或者匹配的方式指明切入点。
3.通知(增强)(Advice)
实际增强的部分,切面要完成的各个工作,比如前置后置日志等。通知类型:前置通知、后置通知、环绕通知、异常通知、最终通知
4.切面(Aspect)
封装 各个通知应用到切入点的过程动作 的一个 标注@Aspect的 类
AOP操作(准备)
1、Spring框架一般都是基于AspectJ实现AOP操作
(1)AspectJ不是Spring组成部分,独立AOP框架,一般把AspectJ和Spirng框架一起使用,进行AOP操作
2、基于 **AspectJ **实现AOP操作
(1)基于xml配置文件实现
(2)基于注解方式实现(使用)
3、在项目工程里面引入AOP相关依赖
4、切入点表达式
(1)切入点表达式作用:知道对哪个类里面的哪个方法进行增强
(2)语法结构: execution([权限修饰符] [返回类型] [类全路径] [方法名称 ]-([参数列表]))
举例1:对com.atguigu.dao.BookDao类里面的add进行增强
execution(* com.atguigu.dao.BookDao.add(..))
举例2:对com.atguigu.dao.BookDao类里面的所有的方法进行增强
execution(* com.atguigu.dao.BookDao.* (..))
举例3:对com.atguigu.dao包里面所有类,类里面所有方法进行增强
execution(* com.atguigu.dao.. (..))
AOP操作( 注解)
1、创建类,在类里面定义方法
import org.springframework.stereotype.Component;

@Component
public class User {
    public void add() {
        System.out.println("add.......");
    }
}
2、创建增强类(编写增强逻辑)
在增强类里面,创建方法,让不同方法代表不同通知类型,@Aspect把当前类标识为一个切面供容器读取。
package com.lxl.spring5.aop.aspectjanno;

import org.aspectj.lang.ProceedingJoinPoint;
import org.aspectj.lang.annotation.*;
import org.springframework.stereotype.Component;

//增强的类
@Component
//把当前类标识为一个切面供容器读取
@Aspect
// 生成代理对象
public class UserProxy {
    // 前置通知
    //@Before注解表示作为前置通知
    @Before(value = "execution(* com.lxl.spring5.aop.aspectjanno.User.add(..))")
    public void before() {
        System.out.println("before.........");
    }

    //后置通知(返回通知)
//    在方法返回结果之后执行
//    异常时不执行
    @AfterReturning(value = "execution(* com.lxl.spring5.aop.aspectjanno.User.add(..))")
    public void afterReturning() {
        System.out.println("afterReturning.........");
    }

    //最终通知
//    方法之后执行
//    异常时也执行
    @After(value = "execution(* com.lxl.spring5.aop.aspectjanno.User.add(..))")
    public void after() {
        System.out.println("after.........");
    }

    //异常通知
//    出现异常执行
    @AfterThrowing(value = "execution(* com.lxl.spring5.aop.aspectjanno.User.add(..))")
    public void afterThrowing() {
        System.out.println("afterThrowing.........");
    }

    //环绕通知
    @Around(value = "execution(* com.lxl.spring5.aop.aspectjanno.User.add(..))")
    public void around(ProceedingJoinPoint proceedingJoinPoint) throws Throwable {
        System.out.println("环绕之前.........");
// 被增强的方法执行
        proceedingJoinPoint.proceed();
        System.out.println("环绕之后.........");
    }
}
3、进行通知的配置
(1)在spring配置文件中,开启注解扫描
\<?xml version="1.0" encoding="UTF-8"?>
\<beans xmlns="http://www.springframework.org/schema/beans" xmlns:xsi="http://www.w3.org/2001/XMLSchema-instance"
       xmlns:context="http://www.springframework.org/schema/context"
       xmlns:aop="http://www.springframework.org/schema/aop"
       xsi:schemaLocation="http://www.springframework.org/schema/beans
       http://www.springframework.org/schema/beans/spring-beans.xsd
       http://www.springframework.org/schema/context
       http://www.springframework.org/schema/context/spring-context.xsd
       http://www.springframework.org/schema/aop
       http://www.springframework.org/schema/aop/spring-aop.xsd">
    <!--=====================AOP注解使用======================-->
    <!--    添加命名空间:aop、context-->
    <!-- 开启注解扫描 -->
    \<context:component-scan base-package="com.lxl.spring5.aop.aspectjanno">\</context:component-scan>

    <!-- 开启Aspect生成代理对象-->
    \<aop:aspectj-autoproxy>\</aop:aspectj-autoproxy>
\</beans>
4.测试
@Test
public void TestAopAnno() {
    ApplicationContext context = new ClassPathXmlApplicationContext("aop1.xml");
   User user= context.getBean("user",User.class);
    user.add();


}
5.细节:共同切入点抽取
    //共同切入点抽取
    @Pointcut(value = "execution(* com.lxl.spring5.aop.aspectjanno.User.add(..))")
    public void samepoint() { }

    // 前置通知
    //@Before注解表示作为前置通知
    @Before(value = "samepoint()")
//    @Before(value = "execution(* com.lxl.spring5.aop.aspectjanno.User.add(..))")
    public void before() {
        System.out.println("before.........");
    }
6、细节:设置增强类优先级
有多个增强类多同一个方法进行增强,设置增强类优先级,在增强类上面添加注解 @Order(数字类型值),数字类型值越小优先级越高。
import org.aspectj.lang.ProceedingJoinPoint;
import org.aspectj.lang.annotation.*;
import org.springframework.core.annotation.Order;
import org.springframework.stereotype.Component;

//增强的类
@Component
@Aspect
@Order(1)
// 生成代理对象
public class PersonProxy {

    //共同切入点抽取
    @Pointcut(value = "execution(* com.lxl.spring5.aop.aspectjanno.User.add(..))")
    public void samepoint() { }

    // 前置通知
    //@Before注解表示作为前置通知
    @Before(value = "samepoint()")
//    @Before(value = "execution(* com.lxl.spring5.aop.aspectjanno.User.add(..))")
    public void before() {
        System.out.println("PersonProxy  before.........");
    }

}
7.完全使用注解开发
(1)创建配置类,不需要创建xml配置文件
@Configuration
@ComponentScan(basePackages = {"com.lxl"})
@EnableAspectJAutoProxy(proxyTargetClass = true)
public class ConfigAop
AOP操作(XML)
1.创建类与增强类
public class Book {
    public void buy() {
        System.out.println("buy--");
    }
}
package com.lxl.spring5.aop.aopxml;
public class BookProxy {
public void before() {
System.out.println("before----");
}
}2.配置切入点
\<?xml version="1.0" encoding="UTF-8"?>
\<beans xmlns="http://www.springframework.org/schema/beans" xmlns:xsi="http://www.w3.org/2001/XMLSchema-instance"
       xmlns:context="http://www.springframework.org/schema/context"
       xmlns:aop="http://www.springframework.org/schema/aop"
       xsi:schemaLocation="http://www.springframework.org/schema/beans
       http://www.springframework.org/schema/beans/spring-beans.xsd
       http://www.springframework.org/schema/context
       http://www.springframework.org/schema/context/spring-context.xsd
       http://www.springframework.org/schema/aop
       http://www.springframework.org/schema/aop/spring-aop.xsd">
    <!--=====================AOP xml操作======================-->
    <!--创建对象-->
    \<bean id="book" class="com.lxl.spring5.aop.aopxml.Book"/>
    \<bean id="bookProxy" class="com.lxl.spring5.aop.aopxml.BookProxy"/>
    <!--配置aop增强-->
    \<aop:config>
        <!--切入点-->
        \<aop:pointcut id="p" expression="execution(* com.lxl.spring5.aop.aopxml.Book.buy(..))"/>
        <!--配置切面,即把通知(增强的部分bookProxy)ref应用到切入点(buy())的过程动作-->
        \<aop:aspect ref="bookProxy">
            <!--增强作用在具体的方法上-->
            \<aop:before method="before" pointcut-ref="p"/>
        \</aop:aspect>
    \</aop:config>
\</beans>
3.测试
package com.lxl.spring5.aop.aopxml;

import com.lxl.spring5.aop.aopanno.User;
import org.junit.Test;
import org.springframework.context.ApplicationContext;
import org.springframework.context.support.ClassPathXmlApplicationContext;

public class TestAopXml {
    @Test
    public void TestAopAnno() {
        ApplicationContext context = new ClassPathXmlApplicationContext("aop2.xml");
       Book book= context.getBean("book",Book.class);
        book.buy();


    }
}
JdbcTemplate

依赖准备
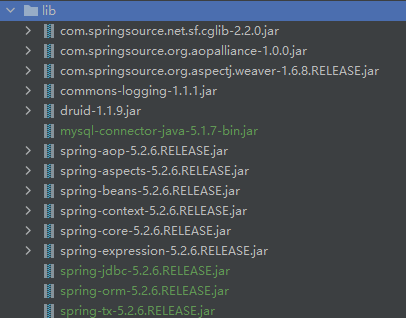
配置连接池
jdbc.properties
prop.driverClass=com.mysql.jdbc.Driver
prop.url=jdbc:mysql://localhost:3306/learn?useUnicode=true&characterEncoding=utf8
prop.userName=root
prop.password=root\<?xml version="1.0" encoding="UTF-8"?>
\<beans xmlns="http://www.springframework.org/schema/beans"
xmlns:util="http://www.springframework.org/schema/util"
xmlns:p="http://www.springframework.org/schema/p"
xmlns:context="http://www.springframework.org/schema/context"
xmlns:xsi="http://www.w3.org/2001/XMLSchema-instance"
xsi:schemaLocation="http://www.springframework.org/schema/beans http://www.springframework.org/schema/beans/spring-beans.xsd
http://www.springframework.org/schema/util http://www.springframework.org/schema/util/spring-util.xsd
http://www.springframework.org/schema/context http://www.springframework.org/schema/context/spring-context.xsd">
<!-- 引入外部文件-->
\<context:property-placeholder location="classpath:jdbc.properties"/>
<!-- 配置druid连接池-->
\<bean id="dataSource" class="com.alibaba.druid.pool.DruidDataSource">
\<property name="driverClassName" value="${prop.driverClass}">\</property>
\<property name="url" value="${prop.url}">\</property>
\<property name="username" value="${prop.userName}">\</property>
\<property name="password" value="${prop.password}">\</property>
\</bean>
<!-- JdbcTemplate对象 -->
\<bean id="jdbcTemplate" class="org.springframework.jdbc.core.JdbcTemplate"> <!--注入dataSource-->
\<property name="dataSource" ref="dataSource">\</property>
\</bean>
<!-- 组件扫描 --> \<context:component-scan base-package="com.lxl.spring5.jdbctemplatel">\</context:component-scan>
\</beans>所有数据库基本操作
创建实体类、service类,创建dao类,在dao注入jdbcTemplate对象
//=======================Dao=============================
import com.lxl.spring5.jdbctemplatel.entity.Book;
import java.util.List;
public interface BookDao {
    public void add(Book book);
    public void delete(String id);
    public void updateBook(Book book);
    public int selectCount();
    public Book selectOneBook(String bookid);
    public List\<Book> selectAllBooks();
    public void batchInsert(List\<Object[]> books);
    public void batchUpdateBook(List\<Object[]> batchArgs);
    public void batchDeleteBook(List\<Object[]> batchArgs);
}

//=======================DaoImpl=============================


import com.lxl.spring5.jdbctemplatel.entity.Book;
import org.springframework.beans.factory.annotation.Autowired;
import org.springframework.jdbc.core.BeanPropertyRowMapper;
import org.springframework.jdbc.core.JdbcTemplate;
import org.springframework.stereotype.Repository;

import java.util.Arrays;
import java.util.List;

@Repository
public class BookDaoImpl implements BookDao {
    //注入JdbcTemplate
    @Autowired
    private JdbcTemplate jdbcTemplate;


    @Override
    public void add(Book book) {
        String sql = "insert into book values(?,?,?) ";
        String args[] = {book.getBookId(), book.getBookName(), book.getBookStatus()};
        int update = jdbcTemplate.update(sql, args);
        System.out.println("更新了" + update + "条数据");
    }

    @Override
    public void updateBook(Book book) {
        String sql = "update book set bookname=?,bookstatus=? where bookid=?";
        Object[] args = {book.getBookName(), book.getBookStatus(), book.getBookId()};
        int update = jdbcTemplate.update(sql, args);
        System.out.println(update);
    }

    @Override
    public void delete(String id) {
        String sql = "delete from book where bookid=?";
        int update = jdbcTemplate.update(sql, id);
        System.out.println(update);
    }

    //查询表记录数
    @Override
    public int selectCount() {
        String sql = "select count(*) from book";
        Integer count = jdbcTemplate.queryForObject(sql, Integer.class);
        return count;
    }

    //查询单个对象
    @Override
    public Book selectOneBook(String bookid) {
        String sql = "select * from book where bookid=?";
        Book book = jdbcTemplate.queryForObject(sql, new BeanPropertyRowMapper\<Book>(Book.class), bookid);
        return book;
    }

    //查询多个对象
    @Override
    public List\<Book> selectAllBooks() {
        String sql = "select * from book";
        List\<Book> query = jdbcTemplate.query(sql, new BeanPropertyRowMapper\<Book>(Book.class));
        return query;
    }

    @Override
    public void batchInsert(List\<Object[]> books) {
        String sql = "insert into book values(?,?,?)";
        int[] ints = jdbcTemplate.batchUpdate(sql, books);
        System.out.println(Arrays.toString(ints));
    }
//    批量修改
    @Override
    public void batchUpdateBook(List\<Object[]> batchArgs) {
        String sql = "update book set bookname=?,bookstatus=? where bookid=?";
        int[] ints = jdbcTemplate.batchUpdate(sql, batchArgs);
        System.out.println(Arrays.toString(ints));
    }

//    批量删除
    @Override
    public void batchDeleteBook(List\<Object[]> batchArgs) {
        String sql = "delete from book where bookid=?";
        int[] ints = jdbcTemplate.batchUpdate(sql, batchArgs);
        System.out.println(Arrays.toString(ints));
    }

}

//======================Service==============================

import com.lxl.spring5.jdbctemplatel.dao.BookDao;
import com.lxl.spring5.jdbctemplatel.entity.Book;
import org.springframework.beans.factory.annotation.Autowired;
import org.springframework.stereotype.Service;

import java.util.List;

@Service
public class BookService { //注入dao
    @Autowired
    private BookDao bookDao;
    public void addBook(Book book){
        bookDao.add(book);
    }
    public void updateBook(Book book){
        bookDao.updateBook(book);
    }
    public void delete(String id){
        bookDao.delete(id);
    }
    public int selectCount(){
       return bookDao.selectCount();
    }
    public Book selectOneBook(String bookid){
        return bookDao.selectOneBook(bookid);
    }
    public List\<Book> selectAllBooks(){
        return bookDao.selectAllBooks();
    }

    public void batchInsert(List\<Object[]> books){
        bookDao.batchInsert(books);
    };
    public void batchUpdateBook(List\<Object[]> books){
        bookDao.batchUpdateBook(books);
    };
    public void batchDeleteBook(List\<Object[]> books){
        bookDao.batchDeleteBook(books);
    };
}


//========================entity============================

public class Book {
    private String BookId;
    private String BookName;
    private String BookStatus;

    @Override
    public String toString() {
        return "Book{" +
                "BookId='" + BookId + '\'' +
                ", BookName='" + BookName + '\'' +
                ", BookStatus='" + BookStatus + '\'' +
                '}';
    }
    public String getBookId() {
        return BookId;
    }
    public void setBookId(String bookId) {
        BookId = bookId;
    }
    public String getBookName() {
        return BookName;
    }
    public void setBookName(String bookName) {
        BookName = bookName;
    }
    public String getBookStatus() {
        return BookStatus;
    }
    public void setBookStatus(String bookStatus) {
        BookStatus = bookStatus;
    }
}
新建对应数据库字段后测试
import com.lxl.spring5.jdbctemplatel.entity.Book;
import com.lxl.spring5.jdbctemplatel.service.BookService;
import org.junit.Test;
import org.springframework.context.ApplicationContext;
import org.springframework.context.support.ClassPathXmlApplicationContext;

import java.util.ArrayList;
import java.util.List;

public class BookTest {
    @Test
    public void jdbcTemplateTest() {
        ApplicationContext context = new ClassPathXmlApplicationContext("jdbctemplate1.xml");
//        增加
//        Book book = new Book();
//        BookService bookService = context.getBean("bookService", BookService.class);
//        book.setBookId("1");
//        book.setBookName("Java宝典");
//        book.setBookStatus("完好");
//        bookService.addBook(book);

//        修改,无值改为null
//        Book book = new Book();
//        BookService bookService = context.getBean("bookService", BookService.class);
//        book.setBookId("1");
//        book.setBookStatus("改了");
//        bookService.updateBook(book);

//      根据id删除
//        BookService bookService = context.getBean("bookService", BookService.class);
//        bookService.delete("1");

//      查询数目
//        BookService bookService = context.getBean("bookService", BookService.class);
//        int i = bookService.selectCount();
//        System.out.println(i);

//      查询单个对象
//        BookService bookService = context.getBean("bookService", BookService.class);
//        Book book = bookService.selectOneBook("1");
//        System.out.println(book);

//        查询一组对象
//        BookService bookService = context.getBean("bookService", BookService.class);
//        List\<Book> book = bookService.selectAllBooks();
//        System.out.println(book);

//       批量新增一组对象
//        BookService bookService = context.getBean("bookService", BookService.class);
//        List\<Object[]> books = new ArrayList\<>();
//        Object[] o1={"3","java","a"};
//        Object[] o2={"4","orcle","b"};
//        Object[] o3={"5","net","v"};
//        books.add(o1);
//        books.add(o2);
//        books.add(o3);
//        bookService.batchInsert(books);

//            批量修改
//        BookService bookService = context.getBean("bookService", BookService.class);
//        List\<Object[]> batchArgs = new ArrayList\<>();
////        sql参数顺序
//        Object[] o1 = {"java1", "a3", "3"};
//        Object[] o2 = {"orcle1", "b4", "4"};
//        batchArgs.add(o1);
//        batchArgs.add(o2);
////        调用方法实现批量修改
//        bookService.batchUpdateBook(batchArgs);

        //批量删除
        BookService bookService = context.getBean("bookService", BookService.class);
         List\<Object[]> batchArgs = new ArrayList\<>();
        Object[] o1 = {"3"};
        Object[] o2 = {"4"};
        batchArgs.add(o1);
        batchArgs.add(o2);
        //调用方法实现批量删除
         bookService.batchDeleteBook(batchArgs);

    }

}
可能BUG
Client does not support authentication protocol requested by server;
mysql -hlocalhost -uroot -p
ALTER USER 'root'@'localhost' IDENTIFIED WITH mysql_native_password BY 'root';
FLUSH PRIVILEGES;
Unknown initial character set index '255' received from server. Initial client character set can be forced via the 'characterEncoding' property.
String url后添加?useUnicode=true&characterEncoding=utf8
mybatis url后添加?useUnicode=true&characterEncoding=utf8
事务
1.什么是事务
(1)事务是数据库操作最基本单元,逻辑上一组操作,要么都成功,如果有一个失败所有操作都失败
(2)典型场景:银行转账
- lucy 转账100元 给mary
- lucy少100,mary多100
2.事务四个特性(ACID)
(1)原子性
(2)一致性
(3)隔离性
(4)持久性
3.事物测试环境搭建
创建数据库
SET NAMES utf8mb4;
SET FOREIGN_KEY_CHECKS = 0;

-- ----------------------------
-- Table structure for t_account
-- ----------------------------
DROP TABLE IF EXISTS `t_account`;
CREATE TABLE `t_account`  (
  `id` varchar(20) CHARACTER SET utf8 COLLATE utf8_general_ci NOT NULL,
  `username` varchar(255) CHARACTER SET utf8 COLLATE utf8_general_ci NULL DEFAULT NULL,
  `money` int NULL DEFAULT NULL,
  PRIMARY KEY (`id`) USING BTREE
) ENGINE = InnoDB CHARACTER SET = utf8 COLLATE = utf8_general_ci ROW_FORMAT = Dynamic;

-- ----------------------------
-- Records of t_account
-- ----------------------------
INSERT INTO `t_account` VALUES ('1', 'lucy', 900);
INSERT INTO `t_account` VALUES ('2', 'mary', 1100);

SET FOREIGN_KEY_CHECKS = 1;
创建service,搭建dao,完成对象创建和注入关系
package com.lxl.spring5.transactionl.dao;

public interface UserDao {
    public void reduceMoney();
    public void addMoney();
}
package com.lxl.spring5.transactionl.dao; import org.springframework.beans.factory.annotation.Autowired; import org.springframework.jdbc.core.JdbcTemplate; import org.springframework.stereotype.Repository; @Repository public class UserDaoImpl implements UserDao { @Autowired private JdbcTemplate jdbcTemplate; //lucy转账100给mary // 少钱 @Override public void reduceMoney() { String sql = "update t_account set money=money-? where username=?"; jdbcTemplate.update(sql, 100, "lucy"); } //多钱 @Override public void addMoney() { String sql = "update t_account set money=money+? where username=?"; jdbcTemplate.update(sql, 100, "mary"); } }
package com.lxl.spring5.transactionl.service;

import com.lxl.spring5.transactionl.dao.UserDao;
import org.springframework.beans.factory.annotation.Autowired;
import org.springframework.stereotype.Service;

@Service
public class UserService {
    //        注入dao
    @Autowired
    private UserDao userDao;

    //转账的方法
    public void accountMoney() {
        // lucy少100
        userDao.reduceMoney();
        // mary多100
        userDao.addMoney();
    }
}\<?xml version="1.0" encoding="UTF-8"?>
\<beans xmlns="http://www.springframework.org/schema/beans"
xmlns:util="http://www.springframework.org/schema/util"
xmlns:p="http://www.springframework.org/schema/p"
xmlns:context="http://www.springframework.org/schema/context"
xmlns:xsi="http://www.w3.org/2001/XMLSchema-instance"
xsi:schemaLocation="http://www.springframework.org/schema/beans http://www.springframework.org/schema/beans/spring-beans.xsd
http://www.springframework.org/schema/util http://www.springframework.org/schema/util/spring-util.xsd
http://www.springframework.org/schema/context http://www.springframework.org/schema/context/spring-context.xsd">
<!-- 引入外部文件-->
\<context:property-placeholder location="classpath:jdbc.properties"/>
<!-- 配置连接池-->
\<bean id="dataSource" class="com.alibaba.druid.pool.DruidDataSource">
\<property name="driverClassName" value="${prop.driverClass}">\</property>
\<property name="url" value="${prop.url}">\</property>
\<property name="username" value="${prop.userName}">\</property>
\<property name="password" value="${prop.password}">\</property>
\</bean>
<!-- JdbcTemplate对象 -->
\<bean id="jdbcTemplate" class="org.springframework.jdbc.core.JdbcTemplate"> <!--注入dataSource-->
\<property name="dataSource" ref="dataSource">\</property>
\</bean>
<!-- 组件扫描 --> \<context:component-scan base-package="com.lxl.spring5.transactionl">\</context:component-scan>
\</beans>- 测试
package com.lxl.spring5.transactionl.test;

import com.lxl.spring5.transactionl.service.UserService;
import org.junit.Test;
import org.springframework.context.ApplicationContext;
import org.springframework.context.support.ClassPathXmlApplicationContext;

public class transactionTest {
@Test
    public void transactionTest() {
    ApplicationContext context = new ClassPathXmlApplicationContext("transaction1.xml");
    UserService userService = context.getBean("userService", UserService.class);
    userService.accountMoney();

}
}
4.出现异常
出现异常后,lucy少100,mary不会变导致数据更改错误。
解决1:try检测异常,catch手动回滚
解决2:使用Spring声明式事务,如下5所示。
public void accountMoney() {
    // lucy少100
    userDao.reduceMoney();
    int i=10/0;
    // mary多100
    userDao.addMoney();
}
5.事务操作(半注解)
事务添加到JavaEE三层结构里面Service层(业务逻辑层)
在Spring进行事务管理操作
(1)有两种方式:编程式事务管理和声明式事务管理(使用)
声明式事务管理
(1)基于注解方式(使用)
(2)基于xml配置文件方式
在Spring进行声明式事务管理,底层使用AOP原理
Spring事务管理API
(1)提供一个接口,代表事务管理器,这个接口针对不同的框架提供不同的实现类
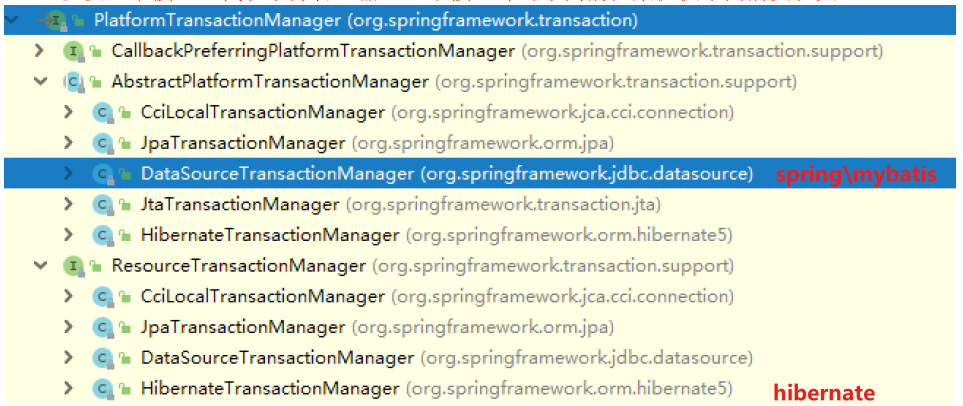
image-20211229135547108 (2)配置事物管理器,引入名称空间 tx,开启事物注解
<!--1.引入名称空间tx-->
xmlns:tx="http://www.springframework.org/schema/tx"
http://www.springframework.org/schema/tx http://www.springframework.org/schema/tx/spring-tx.xsd
<!--2.创建事务管理器-->
\<bean id="transactionManager" class="org.springframework.jdbc.datasource.DataSourceTransactionManager">
    <!--3.注入数据源-->
    \<property name="dataSource" ref="dataSource">\</property>
\</bean>

<!--4.开启事务注解-->
\<tx:annotation-driven transaction-manager="transactionManager">\</tx:annotation-driven>

<!--5.添加@Transactional注解到需要的类或者方法上,其位置决定起作用域。-->
6.事务参数
propagation:事务传播行为
(1)事务传播行为用来描述由某一个事务传播行为修饰的方法被嵌套进另一个方法的时事务如何传播。
 public void methodA(){
    methodB();
    //doSomething
 }

 @Transaction(Propagation=XXX)
 public void methodB(){
    //doSomething
} 代码中methodA()方法嵌套调用了methodB()方法,methodB()的事务传播行为由@Transaction(Propagation=XXX)设置决定。这里需要注意的是methodA()并没有开启事务,某一个事务传播行为修饰的方法并不是必须要在开启事务的外围方法中调用。
(2)Spring中七种事务传播行为
| 事务传播( propagation )行为类型 | 说明 |
|---|---|
| PROPAGATION_REQUIRED | requirde 如果当前没有事务,就新建一个事务,如果已经存在一个事务中,加入到这个事务中。这是最常见的选择。 |
| PROPAGATION_SUPPORTS | supports 支持当前事务,如果当前没有事务,就以非事务方式执行。 |
| PROPAGATION_MANDATORY | mandatory 使用当前的事务,如果当前没有事务,就抛出异常。 |
| PROPAGATION_REQUIRES_NEW | requirde _new 新建事务,如果当前存在事务,把当前事务挂起。 |
| PROPAGATION_NOT_SUPPORTED | not_supported以非事务方式执行操作,如果当前存在事务,就把当前事务挂起。 |
| PROPAGATION_NEVER | never 以非事务方式执行,如果当前存在事务,则抛出异常。 |
| PROPAGATION_NESTED | nested 如果当前存在事务,则在嵌套事务内执行。如果当前没有事务,则执行与PROPAGATION_REQUIRED类似的操作。 |
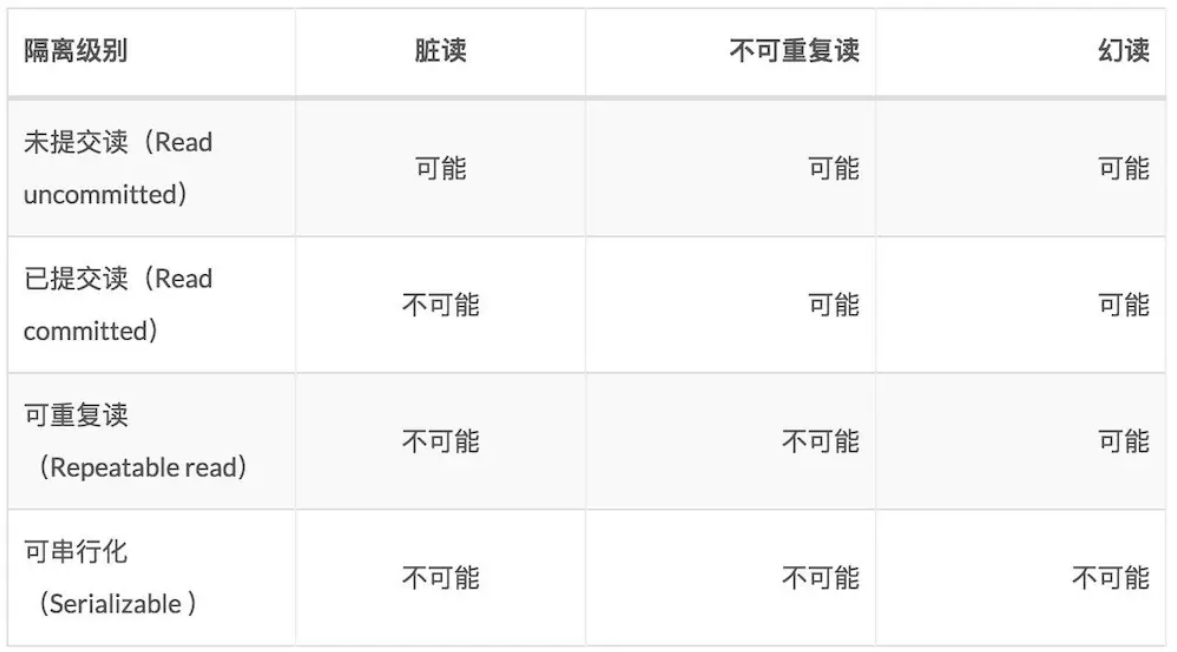
ioslation:事务隔离级别,传播属性
1.首先说明一下事务并发引起的三种情况:
1) Dirty Reads 脏读
一个事务正在对数据进行更新操作,但是更新还未提交,另一个事务这时也来操作这组数据,并且读取了前一个事务还未提交的数据,而前一个事务如果操作失败进行了回滚,后一个事务读取的就是错误数据,这样就造成了脏读。前人后悔后人遭殃
2) Non-Repeatable Reads 不可重复读
一个事务多次读取同一数据,在该事务还未结束时,另一个事务也对该数据进行了操作,而且在第一个事务两次次读取之间,第二个事务对数据进行了更新,那么第一个事务前后两次读取到的数据是不同的,这样就造成了不可重复读。我用坦克你改成飞机
3) Phantom Reads 幻像读
第一个数据正在查询符合某一条件的数据,这时,另一个事务又插入了一条符合条件的数据,第一个事务在第二次查询符合同一条件的数据时,发现多了一条前一次查询时没有的数据,仿佛幻觉一样,这就是幻像读。你吃黄色面包给你塞坨黄色物体
非重复度和幻像读的区别:
非重复读是指同一查询在同一事务中多次进行,由于其他提交事务所做的修改或删除,每次返回不同的结果集,此时发生非重复读。幻像读是指同一查询在同一事务中多次进行,由于其他提交事务所做的插入操作,每次返回不同的结果集,此时发生幻像读。表面上看,区别就在于非重复读能看见其他事务提交的修改和删除,而幻像能看见其他事务提交的插入。
2.隔离级别:
1) DEFAULT (默认)
这是一个PlatfromTransactionManager默认的隔离级别,使用数据库默认的事务隔离级别。另外四个与JDBC的隔离级别相对应。
2) READ_UNCOMMITTED (读未提交)
这是事务最低的隔离级别,它允许另外一个事务可以看到这个事务未提交的数据。这种隔离级别会产生脏读,不可重复读和幻像读。
3) READ_COMMITTED (读已提交)
保证一个事务修改的数据提交后才能被另外一个事务读取,另外一个事务不能读取该事务未提交的数据。这种事务隔离级别可以避免脏读出现,但是可能会出现不可重复读和幻像读。
4) REPEATABLE_READ (可重复读)
这种事务隔离级别可以防止脏读、不可重复读,但是可能出现幻像读。它除了保证一个事务不能读取另一个事务未提交的数据外,还保证了不可重复读。
5) SERIALIZABLE(串行化)
这是花费最高代价但是最可靠的事务隔离级别,事务被处理为顺序执行。除了防止脏读、不可重复读外,还避免了幻像读。
timeout:超时时间
(1)事务需要在一定时间内进行提交,如果不提交进行回滚
(2)默认值是 -1 ,设置时间以秒单位进行计算
readOnly:是否只读
(1)读:查询操作,写:添加修改删除操作
(2)readOnly默认值false,表示可以查询,可以添加修改删除操作
(3)设置readOnly值是true,设置成true之后,只能查询
rollbackFor:回滚
(1)设置出现哪些异常进行事务回滚
noRollbackFor:不回滚
(1)设置出现哪些异常不进行事务回滚
7.事务操作(XML)
续用上面示例,添加一下配置实现以XML方式实现事物操作,去掉@Transaction注解后复制测试方法进行测试。
<!--添加aop命名空间-->
<!--无需事务注解配置-->
<!--    \<tx:annotation-driven transaction-manager="transactionManager">\</tx:annotation-driven>-->

    <!--配置通知-->
    \<tx:advice id="txadvice"> <!--配置事务参数-->
        \<tx:attributes> <!--指定哪种规则的方法上面添加事务-->
            \<tx:method name="accountMoney" propagation="REQUIRED"/> <!--\<tx:method name="account*"/>-->
        \</tx:attributes>
    \</tx:advice> <!--3 配置切入点和切面-->
    \<aop:config> <!--配置切入点-->
        \<aop:pointcut id="pt" expression="execution(* com.lxl.spring5.transactionl.service.UserService.*(..))"/> <!--配置切面-->
        \<aop:advisor advice-ref="txadvice" pointcut-ref="pt"/>
    \</aop:config>
8.事务操作(完全注解)
添加配置类
package com.lxl.spring5.transactionl;

import com.alibaba.druid.pool.DruidDataSource;
import org.springframework.context.annotation.Bean;
import org.springframework.context.annotation.ComponentScan;
import org.springframework.context.annotation.Configuration;
import org.springframework.jdbc.core.JdbcTemplate;
import org.springframework.jdbc.datasource.DataSourceTransactionManager;
import org.springframework.transaction.annotation.EnableTransactionManagement;

import javax.sql.DataSource;

@Configuration
//配置类
@ComponentScan(basePackages = "com.lxl.spring5.transactionl")
//组件扫描
@EnableTransactionManagement
// 开启事务
public class TxConfig {
    // 创建数据库连接池
    @Bean
    public DruidDataSource getDruidDataSource() {
        DruidDataSource dataSource = new DruidDataSource();
        dataSource.setDriverClassName("com.mysql.jdbc.Driver");
        dataSource.setUrl("jdbc:mysql://localhost:3306/learn?useUnicode=true&characterEncoding=utf8");
        dataSource.setUsername("root");
        dataSource.setPassword("root");
        return dataSource;
    }
    //创建JdbcTemplate对象
     @Bean public JdbcTemplate getJdbcTemplate(DataSource dataSource) {
        //到ioc容器中根据类型找到dataSource
          JdbcTemplate jdbcTemplate = new JdbcTemplate();
         // 注入dataSource
          jdbcTemplate.setDataSource(dataSource);
return jdbcTemplate;}

    //创建事务管理器
    @Bean
    public DataSourceTransactionManager getDataSourceTransactionManager(DataSource dataSource) {
        DataSourceTransactionManager transactionManager = new DataSourceTransactionManager();
        transactionManager.setDataSource(dataSource);
        return transactionManager;
    }
}
测试
    //全注解方式测试
//    先去掉@Transaction注解
    @Test
    public void transactionAllAnnoTest() {
        ApplicationContext context = new AnnotationConfigApplicationContext(TxConfig.class);
        UserService userService = context.getBean("userService", UserService.class);
        userService.accountMoney();

    }
Spring5新功能
Log4j2
整个Spring5框架的代码基于Java8,运行时兼容JDK9,许多不建议使用的类和方法在代码库中删除Spring 5.0框架自带了通用的日志封装
(1)Spring5已经移除Log4jConfigListener,官方建议使用Log4j2
(2)Spring5框架整合Log4j2 第一步 引入jar包
准备
导入jar包并导入依赖【2021.12 Log4j2.17.0 RCE(CVE-2021-44832)漏洞】生产建议使用2.17.1以上
创建配置文件log4j2
\<?xml version="1.0" encoding="UTF-8"?>
<!--日志级别以及优先级排序: OFF > FATAL > ERROR > WARN > INFO > DEBUG > TRACE > ALL -->
<!--Configuration后面的status用于设置log4j2自身内部的信息输出,可以不设置,当设置成trace时,可以看到log4j2内部各种详细输出-->
<!--设置INFO会输出前面级别所有日志-->
\<configuration status="INFO">
    <!--先定义所有的appender-->
    \<appenders>
        <!--输出日志信息到控制台-->
        \<console name="Console" target="SYSTEM_OUT">
            <!--控制日志输出的格式-->
            \<PatternLayout pattern="%d{yyyy-MM-dd HH:mm:ss.SSS} [%t] %-5level %logger{36} - %msg%n"/>
        \</console>
    \</appenders>
    <!--然后定义logger,只有定义了logger并引入的appender,appender才会生效-->
    <!--root:用于指定项目的根日志,如果没有单独指定Logger,则会使用root作为默认的日志输出-->
    \<loggers>
        \<root level="info">
            \<appender-ref ref="Console"/>
        \</root>
    \</loggers>
\</configuration>
任意运行程序可见日志,更改<configuration status="INFO"> 查看不同级别日志。
手动加日志
@Test
public void  manualLogTest(){
    final Logger log = LoggerFactory.getLogger(transactionTest.class);
    log.warn("hello log4j==============");
}
@Nullable
Spring5框架核心容器支持@Nullable注解
(1)@Nullable注解可以使用在方法上面,属性上面,参数上面,表示方法返回可以为空,属性值可以为空,参数值可以为空
(2)注解用在方法上面,方法返回值可以为空
(3)注解使用在方法参数里面,方法参数可以为空
(4)注解使用在属性上面,属性值可以为空
GenericApplicationContext
Spring5核心容器支持函数式风格GenericApplicationContext,把自己new的对象加入搜spring管理中。
 //函数式风格创建对象,交给spring进行管理
 @Test public void testGenericApplicationContext() {
 //1 创建GenericApplicationContext对象
 	GenericApplicationContext context = new GenericApplicationContext();
 //2 调用context的方法对象注册
 	context.refresh();
 	context.registerBean("user1",User.class,() -> new User());
 //3 获取在spring注册的对象
 // User user = (User)context.getBean("com.atguigu.spring5.test.User");
 	User user = (User)context.getBean("user1");
 	System.out.println(user);
 }
Spring5支持整合JUnit5
(1)整合JUnit4
第一步 引入Spring相关针对测试依赖

测试代码
package com.lxl.spring5.JunitTest;


import com.lxl.spring5.transactionl.service.UserService;
import org.junit.Test;
import org.junit.runner.RunWith;
import org.springframework.beans.factory.annotation.Autowired;
import org.springframework.test.context.ContextConfiguration;
import org.springframework.test.context.junit4.SpringJUnit4ClassRunner;

@RunWith(SpringJUnit4ClassRunner.class)
//单元测试框架
 @ContextConfiguration("classpath:transaction1.xml")
//加载配置文件
public class JunitTest4 {
    @Autowired
    private UserService userService;

    @Test
    public void test1() {
        userService.accountMoney();
    }
}
(2)Junit5
idea点击@Test导入包
package com.lxl.spring5.JunitTest;

import com.lxl.spring5.transactionl.service.UserService;
import org.junit.jupiter.api.Test;
import org.junit.jupiter.api.extension.ExtendWith;
import org.springframework.beans.factory.annotation.Autowired;
import org.springframework.test.context.ContextConfiguration;
import org.springframework.test.context.junit.jupiter.SpringExtension;
import org.springframework.test.context.junit.jupiter.SpringJUnitConfig;

//@ExtendWith(SpringExtension.class)
//@ContextConfiguration("classpath:transaction1.xml")
//SpringJUnitConfig效果同上面两个同时使用
@SpringJUnitConfig(locations = "classpath:transaction1.xml")
public class JunitTest5 {
    @Autowired
    private UserService userService;

    @Test
    public void test1() {
        userService.accountMoney();
    }
}
Webflux
1、SpringWebflux介绍
(1)是Spring5添加新的模块,用于web开发的,功能和SpringMVC类似的,Webflux使用当前一种比较流程响应式编程出现的框架。
(2)使用传统web框架,比如SpringMVC,这些基于Servlet容器,Webflux是一种异步非阻塞的框架,异步非阻塞的框架在Servlet3.1以后才支持,核心是基于Reactor的相关API实现的。
(3)解释什么是异步非阻塞
异步和同步
非阻塞和阻塞
上面都是针对对象不一样
异步和同步针对调用者,调用者发送请求,如果等着对方回应之后才去做其他事情就是同步,如果发送请求之后不等着对方回应就去做其他事情就是异步阻塞和非阻塞针对被调用者,被调用者受到请求之后,做完请求任务之后才给出反馈就是阻塞,受到请求之后马上给出反馈然后再去做事情就是非阻塞
(4)Webflux特点:
第一 非阻塞式:在有限资源下,提高系统吞吐量和伸缩性,以Reactor为基础实现响应式编程
第二 函数式编程:Spring5框架基于java8,Webflux使用Java8函数式编程方式实现路由请求
(5)比较SpringMVC
第一 两个框架都可以使用注解方式,都运行在Tomet等容器中
第二 SpringMVC采用命令式编程,Webflux采用异步响应式编程
